
OK, so a few weeks ago we released planetary exploration, now I give you Derelict explorations. This uses many of the same items you have been busy ramping up your Assemblers for, keeping it simple for the budding Explorer. This new addition allows a Captain to Track now floating derelict/wrecks in a system, travel to them and dock (with care).
But let’s not get ahead of ourselves. Before you can do any of that, you need to be flying a ship with 2 spare System slots. This allows you to fit a Derelict Scanner System (so you can find the Derelict / Wrecks) and a Docking Hatch System, allowing docking when alongside.
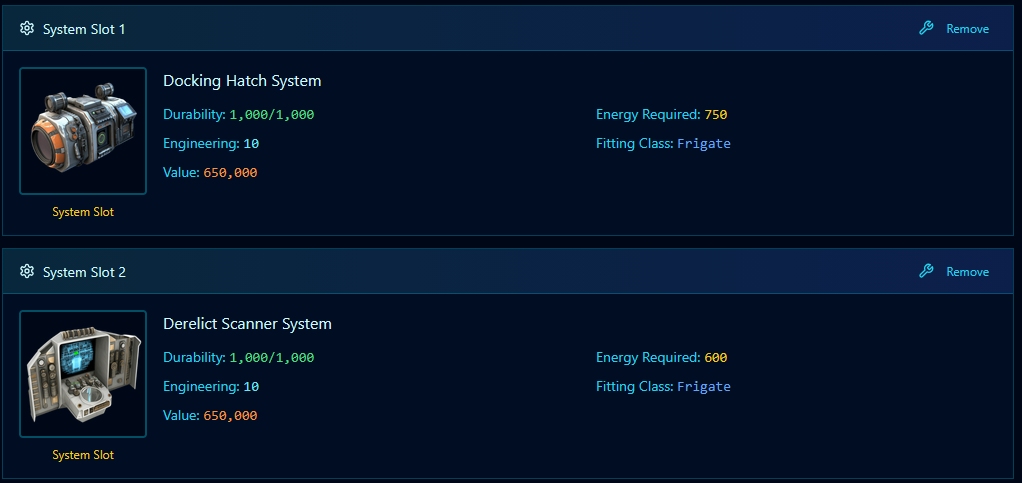
These are crafted items, and the blueprints are available from the standard ‘Blue Print’ store. Look in the System section for these. Note Starter Marauders do not have System slots, so you will need to be in a Crafted Player-Made Ship.
Scanning for Them
Let’s assume you have Crafted or Purchased two system units from a fellow Captain and have them fitted. Now it’s time to head to the Game Ship Scanner. The Addition of the Derelict Scanner adds a new Tab to the scanner. Check it out below.
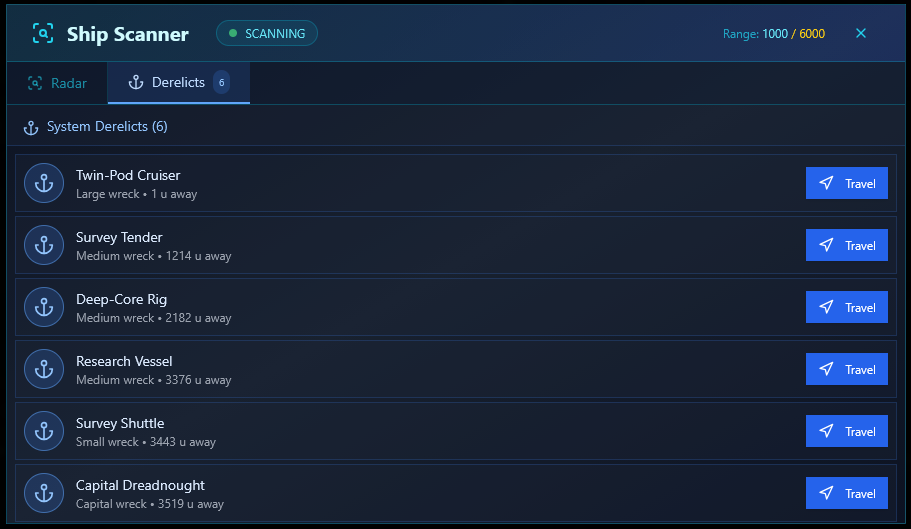
The upgrade allows your ship’s scanner to do an in-depth full System scan. The results are shown as above. The display shows the distance from you and simply clicking the Blue Travel Button will set your in-system Autopilot off.
Remote Support
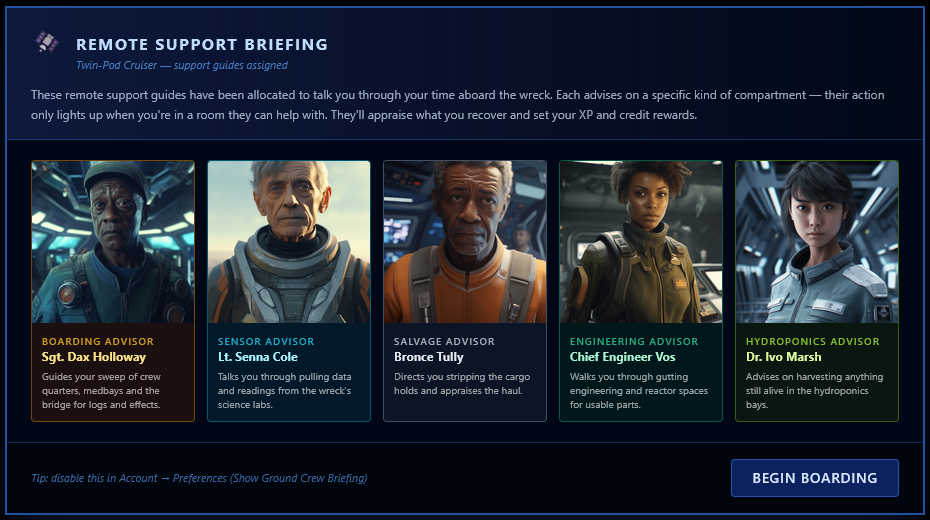
The governments and health and safety (which by the current time has a good way beyond the current Human level of craziness of the 21st century) can’t just let young captains wander off onto Derelicts and Wrecks without first assigning them a stalwart seasoned point of contact for each event you are likely to find yourself in. So you will be assigned automatically several ‘Remote Support’ advisors. They will contact you when a relevant event occurs and steer your choice.
Exploring Proper
Ok, so you made it this far, you chased down a Wreck / Derelict and have gently attached the docking collar to their ship. You flip the switch, open the hatch and step into their Airlock docking bay.
Derelicts are, of course, different from planets. (I probably didn’t need to tell you that, but I’m contractually obligated) 🙂 Each ship will have a designated Floor Plan. You can navigate the halls, rooms, and in some cases different decks, yes, some starships have more than one deck. As you wander around, keep your eye on the Primary stats, that of your Health. As the other four stats drop, they will begin to affect your Health. The only odd one out is Radiation, which climbs and when it starts to encroach on a dangerous level, will in turn affect your Health.
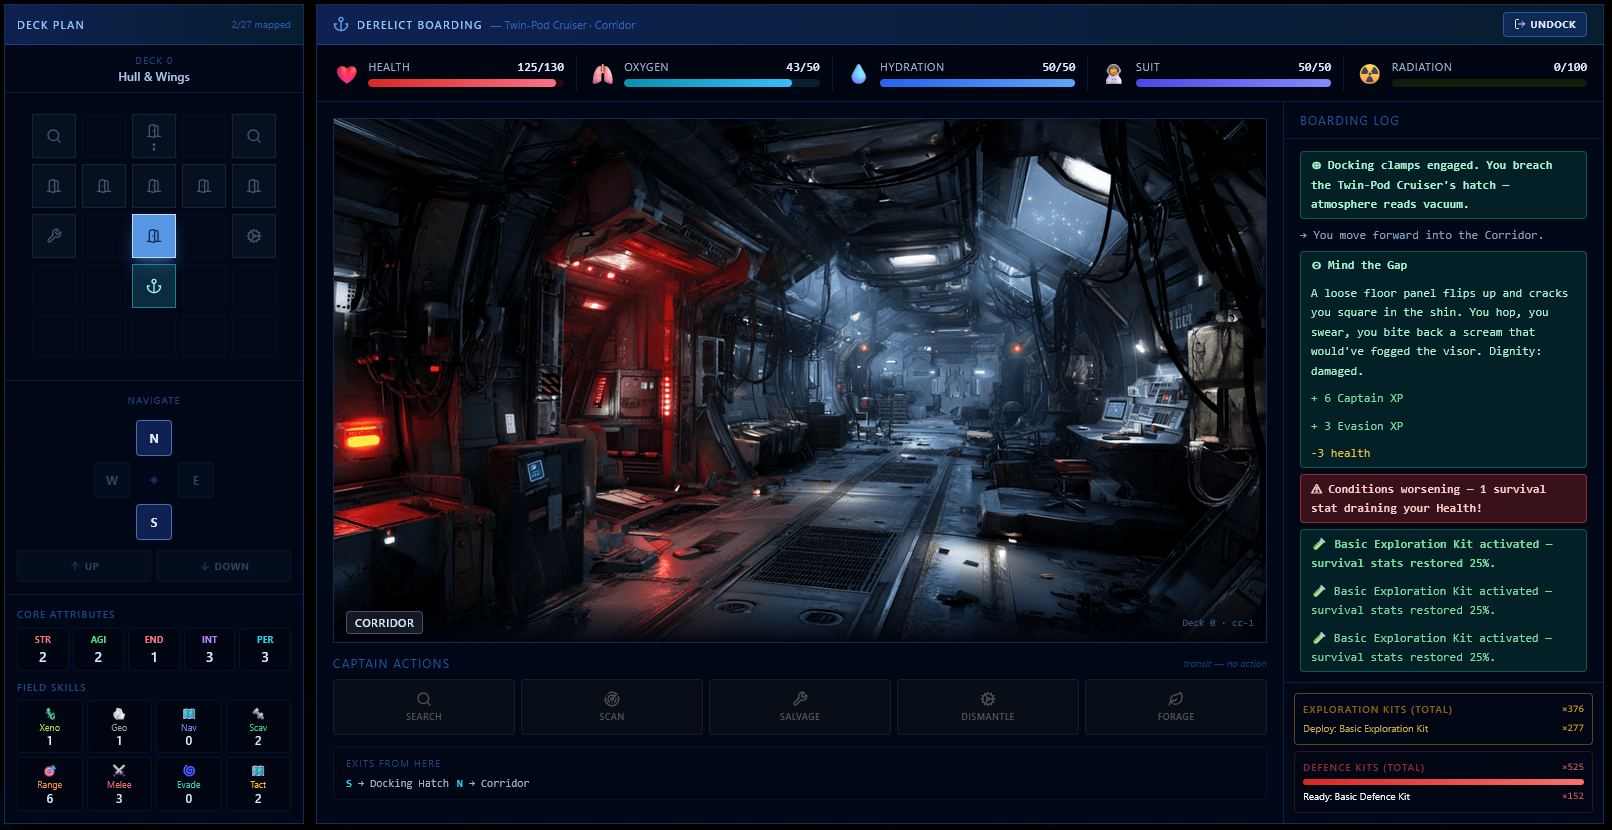
As you can see from above, you can move around in the directions open to you. Look out for the double dots, as this indicates a ladder of lift at this junction. Clicking the Exploration Kits button on the right will repair any issues with your Oxygen, Hydration, Suit and Radiation. It will NOT heal you. So keep an eye on your health. If you fall unconscious, the ship’s AI will send in a bot to collect you and put you in sick bay.
Exploration Kits
These are gated by your Exploration Level, so today, as it stands, players can only use Basic Kits, but as you raise your Exploration Skill, you can slide into better ones. You can craft these via your Assemblers.
Defence Kits
Defence Kits act as your Ranged Weapon and Ammo kit. Basic is a Pulse Laser, Superior is a Laser Carbine and Advanced is a Serious Pulse Rifle. These are also gated by your Exploration Level. So basically, exploring raises your Exploration Level and that in turn allows you to use better kits. You can craft these via your Assemblers.
Captain Stats
The next section covers your stats, which will level whilst on a planet. Along with these are a location title and a brief bio of the location.
Captain Actions
The next section is the Captain’s Actions and the all-important Surface Log. As you move around, you will see the log update. Events from moving will be shown there, and when you locate a location that triggers one of the five actions in the bar above, the results will be placed in your log.
Each of the Captain’s actions can only be used when the icon/button is lit. All the events in Exploration are either tied to a skill or several skills, so over time, expect to get better at things, but expect to fail regularly in the early days.
The final block on the right needs no real explanation – that’s where you are. The title of the location and the descriptor are tied to the image.
Primary stats
Above these blocks, you have your Primary stats for exploring.
Health is your lifeblood; run out of it, and you’ll fall unconscious and be airlifted back to your ship’s med bay and placed in orbit.
Health starts to be affected when one of the other four stats drops to a certain level, or in the case of Radiation increase to a point where your health starts to be affected.
The Solution: USE an Exploration Kit.
There is an Undock button, and your ship will pick you up and break away to a safe orbit.
Earnings
You will earn Captain XP, Credits and Skills Experience. Levelling up the primary Health, Oxygen, Hydration, Suit and Radiation skills will increase their stats.
Exploration Combat
You WILL run into bad guys on these planets. (I’m holding off on releasing the Flora and Fauna attacks at this time; the code is there, but let’s see how you get on with pirate human combat first.)
So combat is turn-based, but you may not be fighting 1 bad guy at a time so who you attack and how is down to you, your skills and some RNG thrown in.
Pirates have some stats on display: their Melee, Ranged and Evasion stats. Initially, these won’t mean much to you as all your stats are starting at zero 🙂 You’re going to be outmatched, but you will soon start to level up your skills, and these fights will start to turn in your favour.
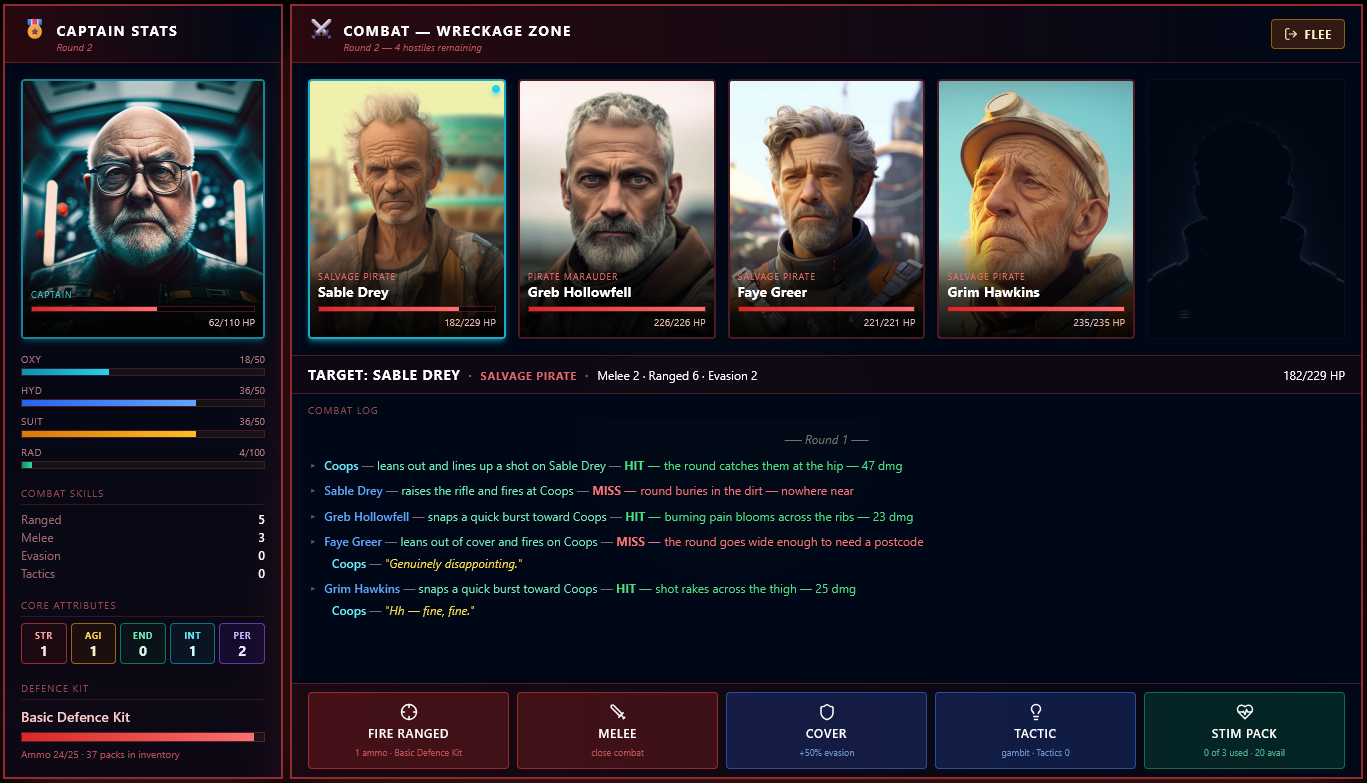
You have five options
Fire Ranged (the Defence Kit Ammo will show in the bottom left, and as you fire, the magazine will drop and refill automatically as you slap in the next Defence Kit. Again, the Ship’s AI will automatically use the highest kits you have available and will auto-use as you run out.
Melee – level just like ranged combat by using it. Closing in and punching them on the nose or kicking them where the sun doesn’t shine can be gratifying. Plus, you might run out of ammo lol!
Cover – this gives you a 50% evasion rating on the next move, use it or don’t; as you get better at it, the action starts to have some cool effects, especially when facing more than 1 opponent.
Tactic – Fancy throwing a stun grenade at them or using distraction and guile to get the best of the bad guys before drilling them full of holes? Level this one for effect.
Stim Packs: Did you craft any (Assemblers)? Did you bring any? You get a free turn up to 3 times per combat to use them. They are not cheap, but a good way to survive more than one opponent.
Rewards
Killing Pirates / Bad guys is fair and will also give you Dog Tags 🙂
Notes on Loot:
Players will find that, apart from the Dog Tags, all loot found whilst exploring goes DIRECTLY to your CS. Yes, I’ve been kind and decided that limiting you to cargo space was not needed.
The true limiting factor is event outcomes, combat outcomes and how many Exploration Kits you brought with you!